Hitched Hacks: How to Make Your Own DIY Confetti Cones
Your wedding confetti needs gorgeous wedding cones and you can make these for pennies!
We have included third party products to help you navigate and enjoy life’s biggest moments. Purchases made through links on this page may earn us a commission.


Confetti cones are such a gorgeous way to serve your wedding confetti to guests for that all-important throwing photo.
Have a basket with these filled cones in your ceremony venue or build a mix-your-own confetti station with bowls of different colours or petals for guests to fill up a cone with.
You don’t have to limit yourself to confetti though. These cones are ideal to fill with popcorn, sweets or chocolates and place around your dessert table. You could even wrap sweet-filled cones in cellophane and give them to young guests as a cute wedding favour!
We have two designs that are incredibly simple and cheap to make yourself: a stamped white confetti cone with ribbon, and a doily cone.
Here’s our easy step-by-step confetti cones DIY tutorial.
What You’ll Need
- Glue gun
- Ruler
- Scissors
- Confetti (we used Shropshire Petals)
- Popcorn, sweets, chocolate (optional)
For the doily cones
- Paper doilies
For the stamped cones
- A4 sheets of white card
- Stamp selection (we used this alphabet set)
- Ink pads (we used this metallic ink set)
- Ribbon
How to Make Doily Cones
Step One

Cut the doily in half down the centre.
Step Two

Glue along one half of the inside edge and bring the sides together, overlapping them slightly, to make a cone.
Step Three

Fill with paper confetti or biodegrable petal confetti – or something completely different like sweets or popcorn. Display in a box, basket or confetti stand.
How to Make the Stamped Cones
Step One

Measure and cut a 6×6 inch square from your white card and use this as a template to cut out as many as you need for your guests.
Step Two

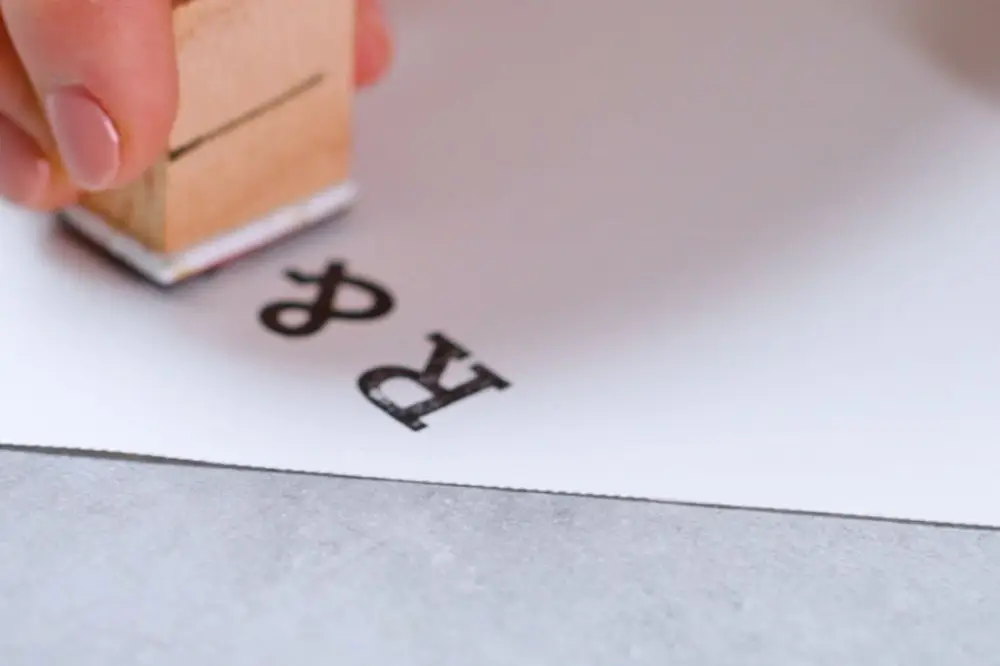
Turn the card 45 degrees clockwise so it looks like a diamond. Decorate the top corner with whatever stamps you like: we love using intitials but a Mr & Mrs or a heart stamp look great. Once dry, you can turn the card over and decorate the other side too.
Tip: Test out your stamping skills a few times on scrap paper. Make sure the whole design is covered in ink, and you press down evenly and firmly. It doesn’t matter if it looks a little rustic – it’s homemade.
Step Three

Turn the card back round. Place the top of the ruler about 1.5 inches in and down from the right-hand edge of the card and angle it towards the bottom right-hand corner so you create a triangle. Taking your scissors, score right into the corner.
Step Four

Fold down the crease and bring the opposite edge of the card inwards so the edges meet. Stick down with your glue gun, making sure the glue goes all the way to the bottom – you don’t want any confetti falling out!
Step Five

Once dry (this takes seconds), you can add additional decoration. We love washi tape, ribbon or lace. Use your glue gun to secure in place. Then fill!
We’ve used popcorn here – a great idea if you’re putting a film on for kids on a separate room or as a child-friendly wedding favour. Display in a basket, box or confetti stand.
If you’re a DIY fan, you’ll love our ideas for DIY wedding favours and a genius way to preserve your wedding flowers at home.
Thanks to Shropshire Petals for the gorgeous petal confetti!


