Wedding Bunting: A DIY Tutorial
We teamed up with craft magazine Simply Sewing to give you a guide to making your own gorgeous, vintage inspired wedding bunting
We have included third party products to help you navigate and enjoy life’s biggest moments. Purchases made through links on this page may earn us a commission.

Wedding DIY is a fun and creative way to keep costs down when you’re watching your budget.
If you’re feeling crafty and fancy having bunting at your wedding – it is the perfect vintage wedding essential – then you’re in the right place.
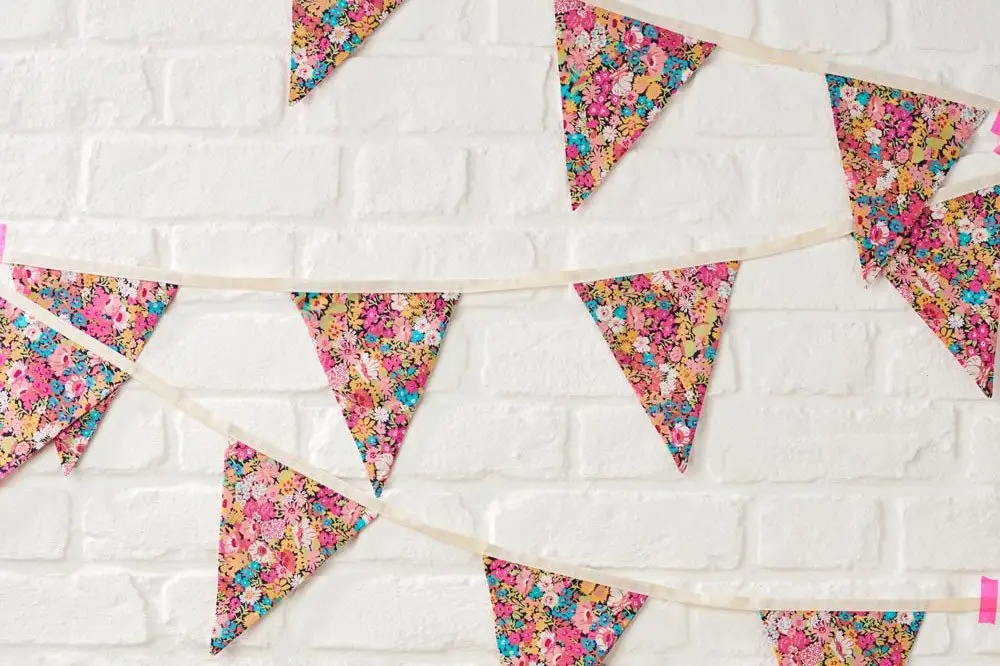
Bunting works at so many styles of wedding – whether you want a classic, vintage style day or you’re planning a festival themed wedding with the perfect yurt wedding venue.
We teamed up with the fabulous Simply Sewing magazine to bring you this amazing DIY wedding bunting tutorial. You’ll have fun, festive bunting for your wedding in no time at all.
READ MORE: The Most Amazing Festival Wedding Venues

You Will Need
- Cotton fabric
- Cotton tape: 2.5cm (1in) wide
- Basic sewing kit
- Template
Notes
- Use a 1cm (3/8in) seam allowance throughout
- Use the template provided
Fabric Used
The team at Simply Sewing used ‘tana lawn’ fabric from Liberty. It is 137cm wide.
However any pretty, floral fabric will add to your shabby chic décor, or use glittery material or bold colours for a more statement look.
READ MORE: How to Choose Your Wedding Colour Scheme

How to Make Your Own Wedding Bunting
Calculating the Fabric
Step One
You can use any fabric for your bunting that you like. We used a pretty cotton print. You’ll need 25x40cm (10x16in) for each flag.
Step Two
Decide how long you want your bunting to be. The finished flags are 15cm (6in) wide and we left a gap of 10cm (4in) between each one. So, if you divide the length you want you finished bunting to be by 25cm (10in) then that will give you the number of flags you need.
Step Three
Cut a length of cotton tape in a colour to coordinate with your fabric to the length of your finished bunting plus 30cm (12in) extra on each end for tying it up. The flags will be stitched to this.
Cutting Out
Step One
Trace round the bunting flag template and cut it out.
Step Two
Cut two pieces of fabric, each measuring 25x20cm (10x8in).
READ MORE: The Best DIY Wedding Favours

Step Three
Place the two pieces of fabric right sides (RS) together and pin the flag template centrally on top.

Step Four
Cut round the template through both layers of fabric.
Step Five
Unpin then template then pin the two triangles of fabric together.

Stitching the Flags
Step One
Using a 1cm (3/8in) seam allowance, stitch the two fabric triangles together, down one top short edge, then down the side, up the other side and up the other short straight edge.
Step Two
Leave the top open and remember to reverse stitch at the beginning and end of your stitching to secure.

Trimming the Seams
Step One
Trim the seams to reduce the fabric bulk at the bottom point of the fabric. This will help the flag lie flatter and have a sharper point once it’s turned RS out.
Step Two
Snip the bottom point of fabric off about 2mm (1/16in) below the stitching but take care not to cut the stitches. Taper the fabric edge to this point so there is less fabric outside the seams on both sides.
READ MORE: Does a DIY Wedding Actually Save You Money?

Finishing the Flags
Step One
Turn the triangles RS out and press so that the seams lie right on the edges. Lightly press with an iron.
The short straight sides at the top of each side allow the flag to lie more neatly within the cotton tape when you assemble the bunting so make sure you press these neatly into place too.

Step Two
Make as many flags as you need in exactly the same way.

Pinning the Flags in Place
Step One
Fold the cotton tape in half lengthways with the wrong sides (WS) together and press all along the length to make a neat crease down the centre.
Step Two
With the folded edge of the tape at the top, measure 30cm (12in) (or from the left side) and mark with a pin.
Step Three
Unfold the tape then place one stitched flag on top of it so that the top of the flag meets with the fold. Fold the tape back down on top and pin into place.
Step Four
Measure 10cm (4in) from the right top edge of the pinned flag along the tape and mark with a pin. Pin the next flag inside the folded tape in exactly the same way.
Step Five
Repeat this to pin all your flags along the length of tape.
READ MORE: The Ultimate Guide to DIY Wedding Invitations

Step Six
Turn both short ends of the cotton tape under by 1cm (3/8in) to the inside of the folded tape and pin.
Stitching the Bunting
Step One
Starting at one end of the cotton tape, stitch along your binding, 2mm (1/16in) from the tape edge making sure you stitch through both the front and back of the binding and through the flags too.

The stitching should go through the flags and through the tape between them to keep the tape folded and hold the flags securely.

Our Favourite Fabrics For Your Bunting
Liberty English Garden Fabric – £3.95 per Half Meter

Ditsy Floral Fabric – £2.95 per Half Meter

Michael Miller Botanika Fabric – £6.00 per Half Meter

The Cottage Garden Liberty London Fabric – £7.50 per Half Meter

Green & Red Floral Fabric – £2.95 per Half Meter

READ MORE: Everything You Need to Know About DIY Wedding Make-Up
If you loved making your own bunting and want more crafting ideas, make sure you check out Simply Sewing – Hitched users can enjoy a free gift when they subscribe – there’s inspiration and guides to help you DIY so much – from bridesmaid dresses to decorations and gifts.

Those that want more DIY tutorials right now, don’t miss our guide to making your own floral crown, or watch our round up of DIY wedding makeup tutorials for all skin tones.


