Marble Wedding Invitations: Examples and a DIY Tutorial
We've gathered together the most beautiful marble wedding invitations and even have a DIY tutorial so creative couples can make their own!
We have included third party products to help you navigate and enjoy life’s biggest moments. Purchases made through links on this page may earn us a commission.

If you want your wedding stationery to be stylish, modern and sleek, a marble wedding theme is pretty much a no-brainer.
The first glimpse your guests will get of your amazing theme are the wedding invites.
Marble wedding invitations come in a variety of styles and, with so many patterns and colours available, it’s almost impossible to make a decision. To help make your life easier, we’ve gathered some of our favourite marble wedding invitations, along with a step-by-step DIY tutorial to make your own marble themed invites.
Once they’re made, make sure to see our wedding invitation wording guide. if you’re not sure the etiquette for writing out invite, this has you covered!
READ MORE: DIY Wedding Invitations You Can Make Yourself
Pink Marble Wedding Invitation
Peardrop Avenue have used a pink marble background for this wedding invitation design and layered it with a white geometric pattern and beautiful calligraphy-style font. We love the splash of colour and the giant couple names – it’s a striking design with plenty to shout about.
READ MORE: Floral Wedding Stationery
Monochrome Marble Wedding Invitation
Not a huge fan of bright colours? Fear not, I Am Nat has created a stunning monochrome marble wedding invitation with a chic minimalist theme. The simple colours, combined with the marble background and quirky layout, make for such a modern design.
READ MORE: 9 Ways to Save Money on Your Wedding Stationery
Ombre Marble Wedding Invitation
This design from Arte Papery almost combines the above two with the fusion of monochrome and pink marble. The cloudy tones and gold foiling work so well together and we love the diamond shape – it really frames the invite. Want a wedding invitation which is totally unique? If so, this could be the one…
READ MORE: Alternative Wedding Invitations
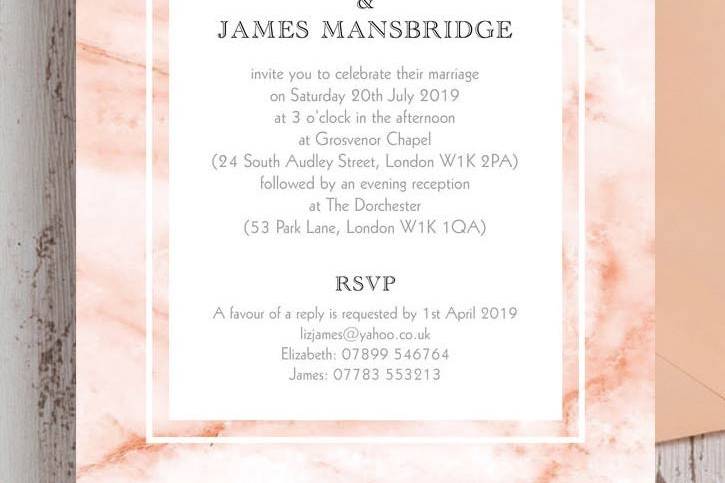
Peach Marble Wedding Invitation
The colour palette on this Hip Hip Hooray Studio design is very stylish. Pastels are a great choice of colour scheme, especially for a spring or summer wedding, and we just adore this peachy orange shade. The rectangular border and background are simple and frame the invite perfectly. The envelope colour is just as pretty and really ties in with the marble wedding invitation itself.
READ MORE: Summer Wedding Ideas
Geometric Marble Wedding Invitation
This marble pattern is almost mesmerising ito look at. The faded swirls are complemented beautifully by the grey and pastel pink geometric shapes – they really bring the design to life. Couples who’re planning a modern wedding should definitely consider a design like this one by Polka Dot Paper UK.
Simple Marble Wedding Invitation
If fussiness, bright colours and a busy-looking wedding invitation are your worst nightmares, you might just fall head over heels in love with this beautiful marble creation by Amanda Michelle Design & Stationery. How could you not – it’s oozing with elegance and sophistication!
READ MORE: Elegant Wedding Stationery
How To Make Your Own Marble Wedding Invitations
If you’re feeling creative and want to hack your wedding budget with a few handy DIYs, why not trying making your own marble wedding invitations? DIY wedding invitations can look just as amazing as shop-bought or online-ordered ones – and this tutorial proves just that!
We teamed up with Cardmaking & Papercraft magazine and asked them for their expert advice when it comes to stylish DIY wedding invitations – they’ve come up with a step by step guide to making your own beautifully on trend marbled stationery.
You Will Need
Pebeo Marbling Kit, £29.99 from Homecrafts
Xcut Corner Punch 10mm, £6 from Hobbycraft
Elegant Butterflies stamps, £11 from Clearly Besotted Stamps
With Love stamp, £9 from Clearly Besotted Stamps
Blue card
White card
Blue ink pad
A6 base cards and envelopes
Velcro hook and loop fastener
Butterfly punch
Corner rounder punch
Cocktail stick
(All available from your local craft shop)
How to Do It
Step One
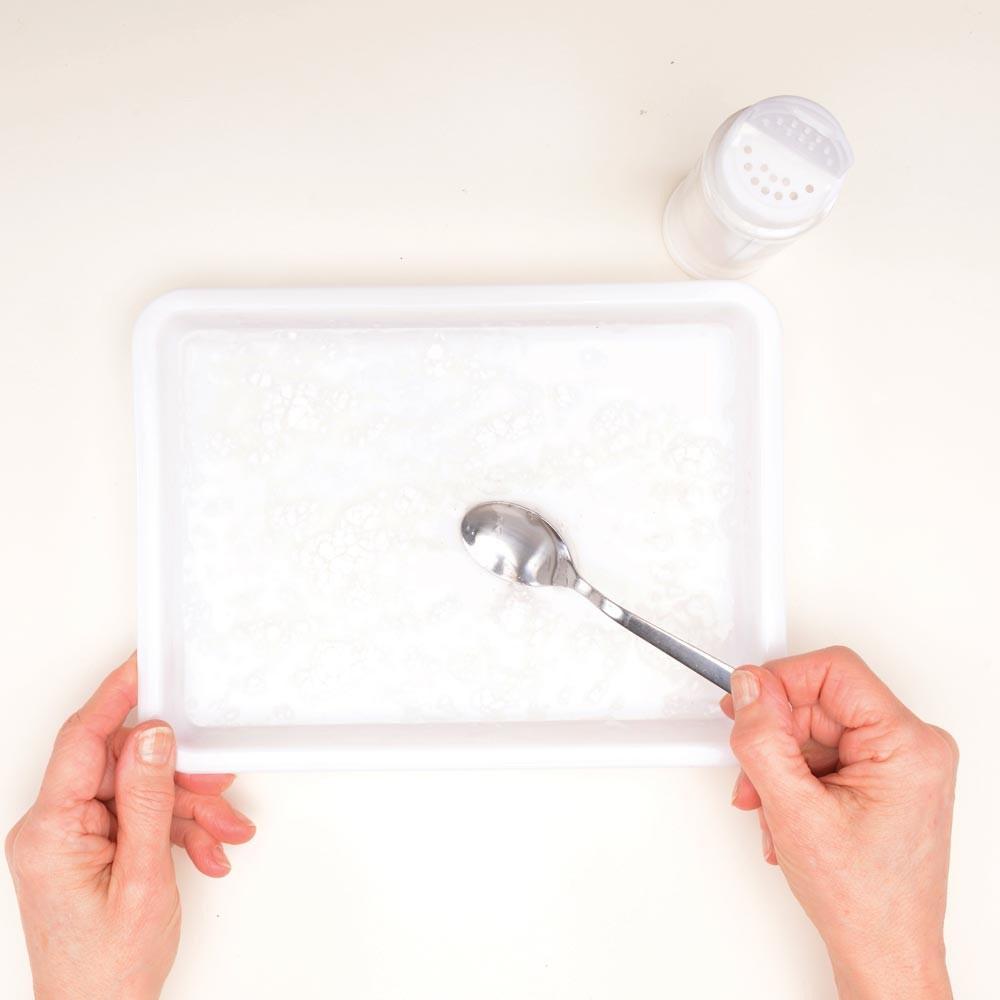
Using your marbling kit, pour 300ml of warm water into the marbling tray. Slowly sprinkle one to one and a half teaspoons of Size powder over the water. Stir the water continuously until you have a smooth and slightly thick consistency. Let the mixture cool to room temperature before moving on.
Step Two
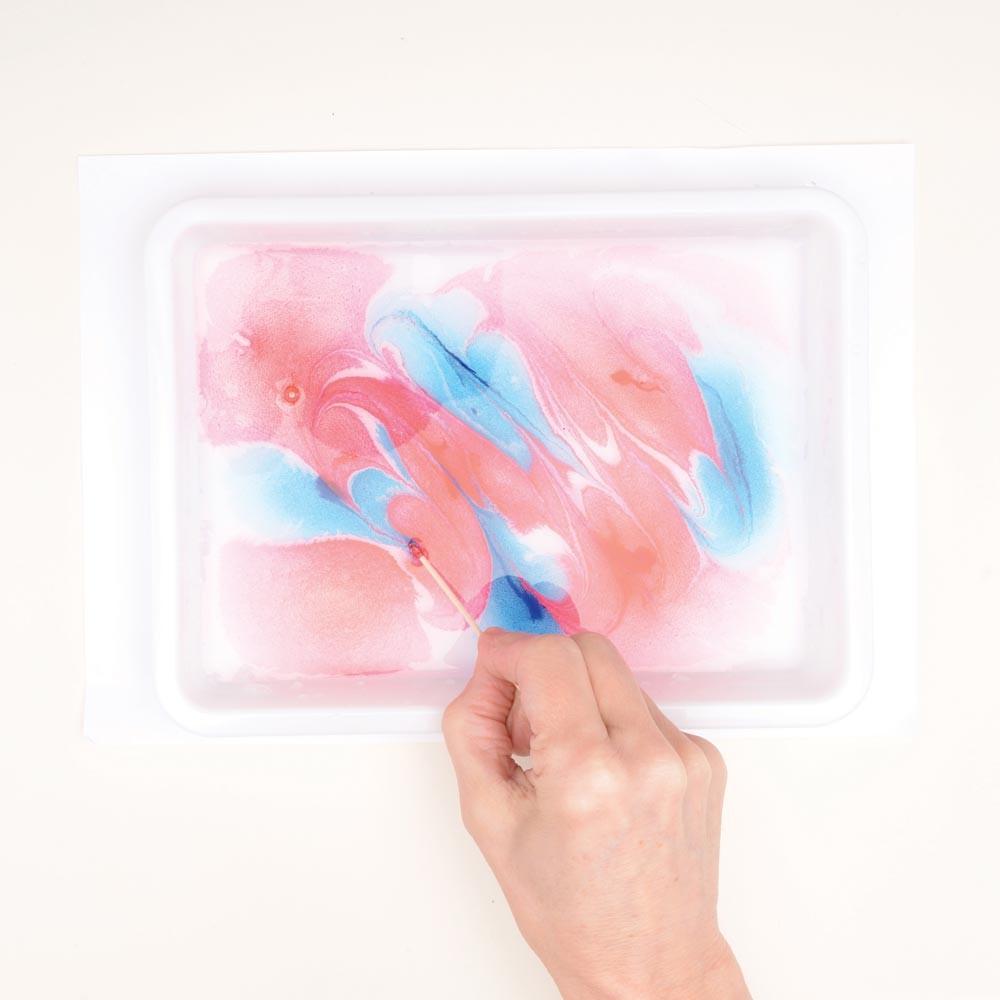
Add little drops of the red ink on to the surface of the mixture, followed by the blue ink. Allow the colours to spread and merge together before using your cocktail stick to twirl the inks around and push them into each other to create a swirled pattern.
Step Three
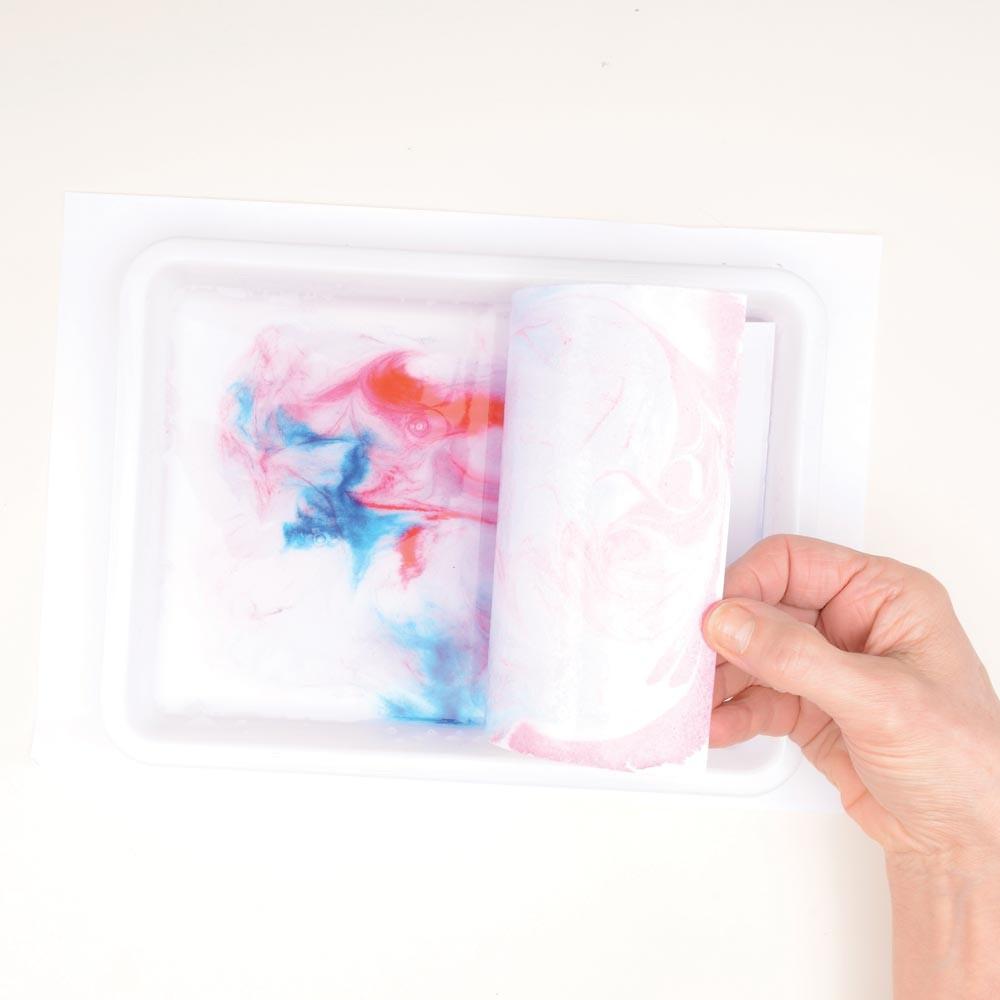
Gently lay white card on top of the mixture for a few seconds before removing. Rinse off the excess Size mixture with cold water and leave the card to dry. Blot the surface of the Size mixture with newspaper before adding more drops of ink ready for the next pattern.
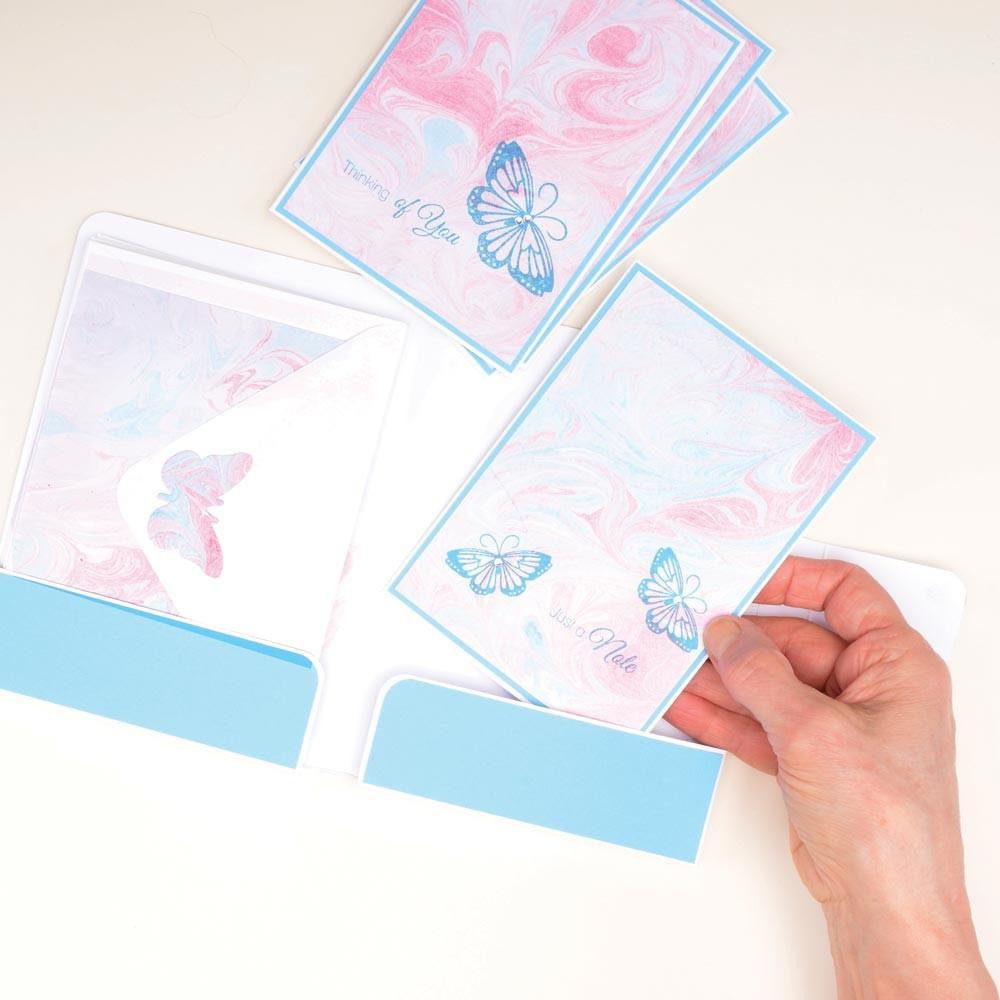
To make the notelets that will go within the card wallet, marble pieces of white paper and then trim each one to 140x100mm. You can use the stamps to add a butterfly motif, before layering each notelet when dry on to blue card before gluing to one of your white A6 base cards. Why not add small gems or diamantes to dress them up?
Step Four
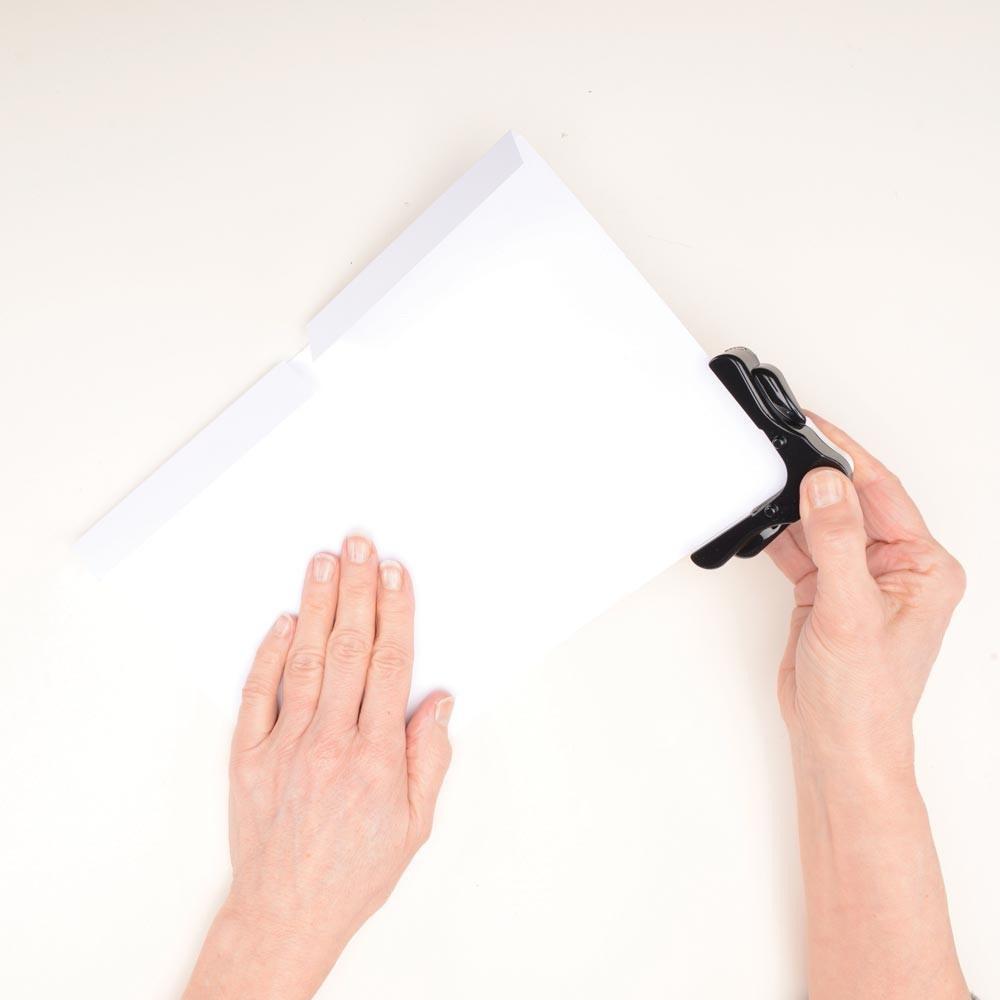
Using the Cardmaking & Papercraft wallet template, cut out the wallet shape from the white card. Following the template, fold the card to make a book shape with the lower edges folded inside. Use the corner rounder punch to round off the top corners.
Step Five
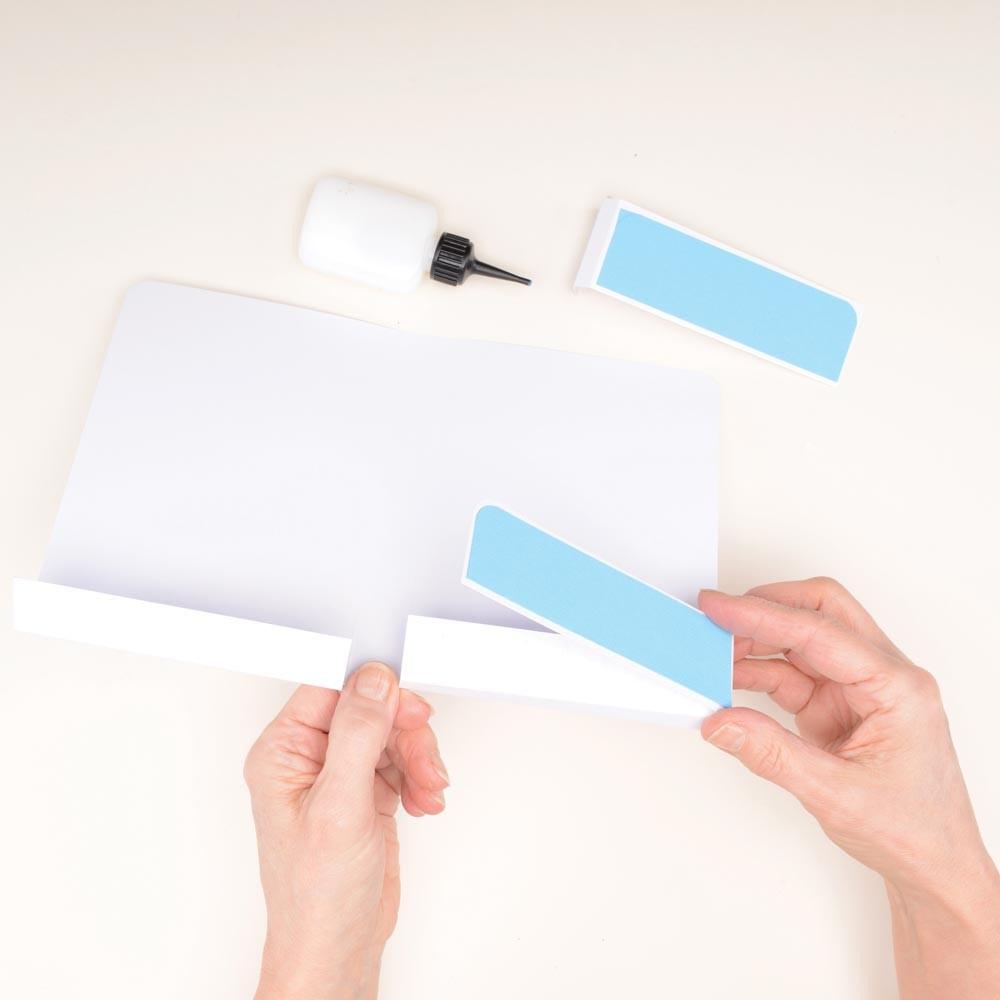
Still following the template, cut two inside pockets from white card and score and fold them. Cut panels from the blue card and round the top edges and glue the edge of the flaps to the inside of the wallet along the bottom edge. Once you’ve done this, wrap around the folds to form pockets.
Step Six
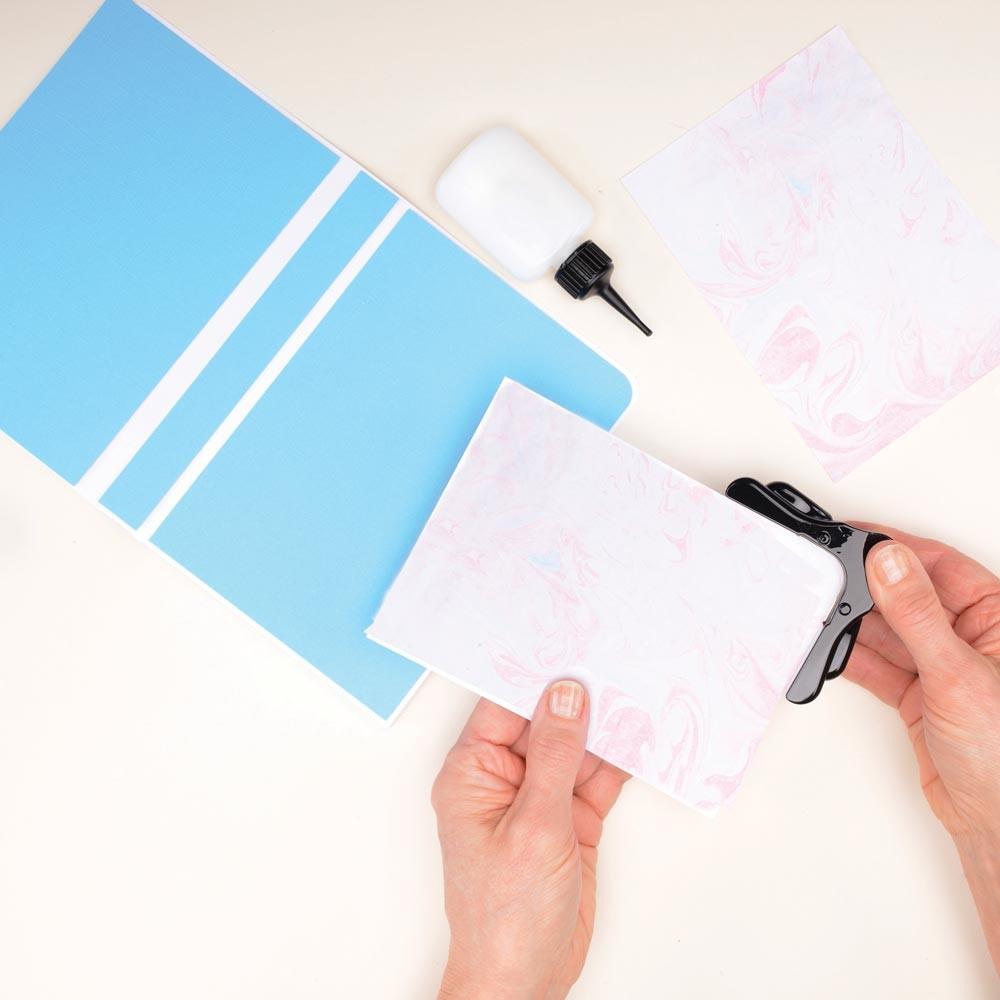
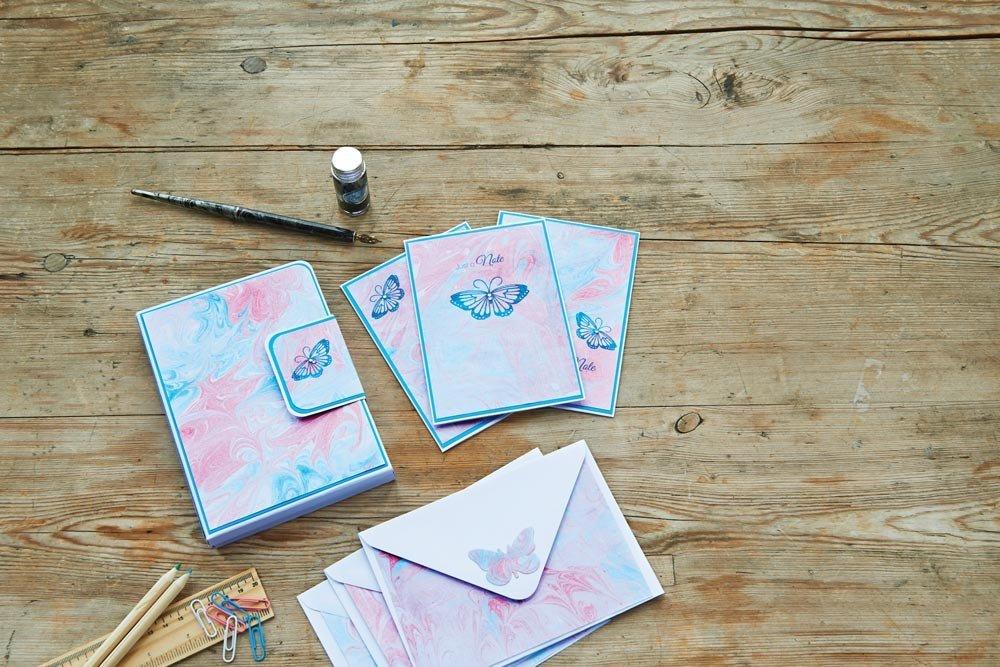
Layer two pieces of the marbled card (measuring 115x165mm) onto the blue card and round the top corners. Stick this to the front and back panels of the wallet, before cutting a 165x15mm strip of marbled card and attaching it to the blue card before gluing it to the spine.
Step Seven
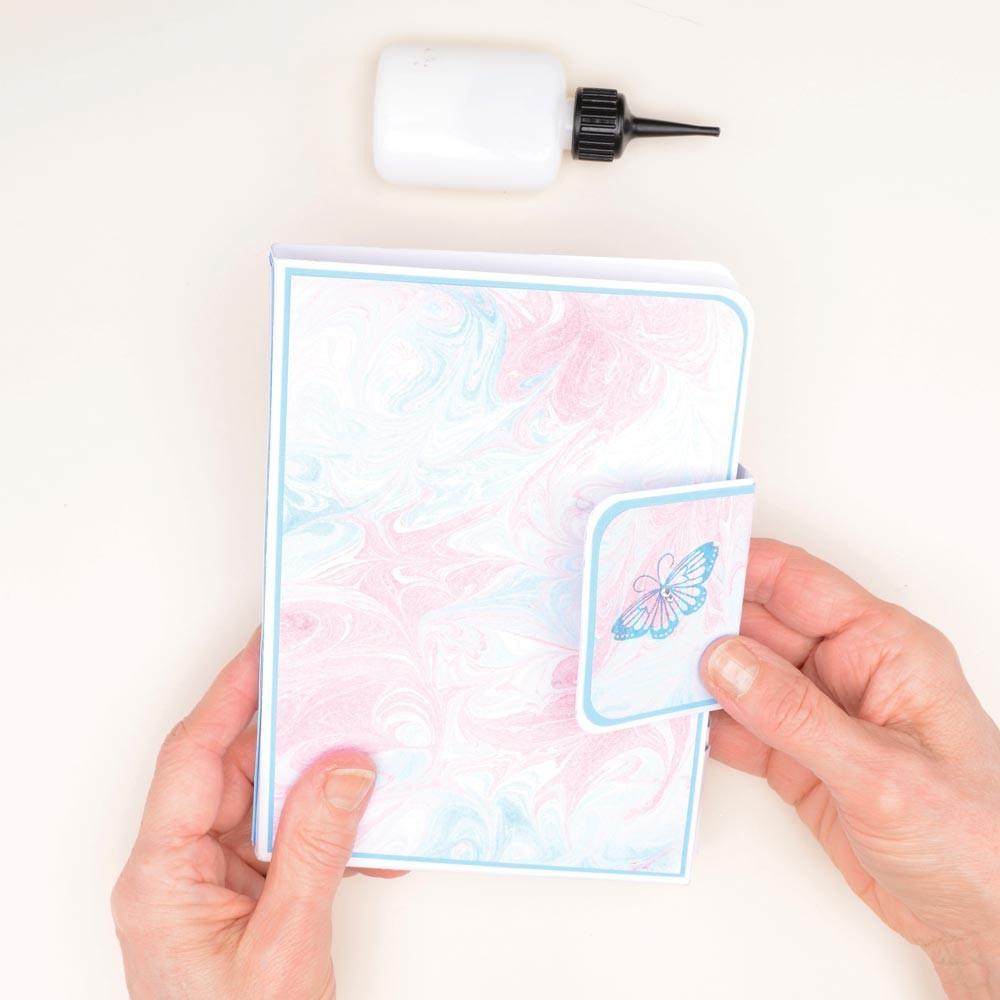
Refer back to the template – cut a closure from the white card and a 90x60mm piece of marbled card. Add this to the blue card and attach it to the closure, rounding the edges on the left hand side. Score it, stamp it with the butterfly stamp and then stick it to the back section of the wallet.
Step Eight
Wrap the rest of the closure around to the front of the wallet, and add the Velcro to fasten it. Add the Velcro hook to the front of the wallet and the loop to the closure.
Step Nine
You could marble the envelopes to continue the look, but why not make envelope liners instead for a more subtle take? Simply marble white paper and cut it down to size to fit in your envelopes. Use the butterfly punch to cut out some shapes before affixing it to the inside of your envelopes. You can then put the cards and envelopes inside the wallet to present them to your guests, after writing out or printing your wedding information.
Top Tips
- If the marbling inks spread too quickly on the surface of the Size mixture, don’t panic. Simply add a little more of the powder to thicken the mixture. If the colours aren’t spreading enough, just add more water before mixing well.
- Bear in mind that marbled paper can be very delicate when wet, so handle it with care and be cautious when removing it from the marbling mixture – the best way to do it is to hold and lift it from just the top two corners.
- Why not mix up the marbled pattern? You can create lots of different patterns by using different things to drag through the mixture. Instead of a cocktail stick, try running a fork through it or flicking the ink into it using a paintbrush.
- If the paper or card is crinkled when it’s dry, you can smooth it out by placing it between two tea towels and ironing using a dry iron on a very low heat.
- Coordinate your wedding stationery by marbling even more items – you could marble your place cards or wedding table plan. You could even jazz up your wedding nails by marbling them!
- If you think a DIY wedding invitation is a bit too much effort for you, why not browse our edit of the best handmade wedding invitations, where someone else has done all the hard work?


