15 Ideas & Tips for Your DIY Wedding Invitations
Nail your DIY wedding invitations with these ideas and tips that are so simple, even the most novice crafters can have a go
We have included third party products to help you navigate and enjoy life’s biggest moments. Purchases made through links on this page may earn us a commission.


Are you considering crafting your own DIY wedding invitations for your special day?
If so, you've come to the right place. Whether you're dead set on designing your own wedding invites, or are still umming and ahhing on whether or not to tackle these yourselves, this guide has something that'll help you.
Here, you'll find information on the types of DIY bridal invitations (there's different levels of 'do it yourself', obviously!), ideas for DIY invite designs you could tackle at home, and tips on everything you need to consider before you decide to take this task on.
Of course, many couples wonder - what are the pros and cons of DIY wedding invitations? The truth is, there are a few things to consider before you opt for the craft route, and we cover all of those things in this article.
So, let's answer the age-old question: how to make your own wedding invitations!
DIY Wedding Invitations: Ideas & Tips for Crafty Couples
Wedding stationery suppliers are masters and experts at what they do, so unless you're a crafting whizz yourself, it's unlikely your DIY wedding card invitations will look as finessed as the pros, however don't let anyone tell you you can't create your own wedding invitations that look perfectly pretty, because you can, and this guide is here to help you do just that!
- Types of DIY Wedding Invitations
- Ideas for DIY Wedding Invites
- Tips on How to DIY Wedding Invitations
Types of DIY Wedding Invitations
'DIY wedding invitations' is a blanket term for anything made by you, but there are levels when it comes to how much you actually have to do yourself. Here are a few different types of ways you can approach do it yourself wedding invitations.
Many of these options come in wedding invitations packages that make it super easy for couples to buy their chosen design in a bundle, or even as a digital download to print at home.
1. Editable Wedding Invitation Templates

The least labour-intensive way to have DIY wedding invitations is to find an editable digital template online, with a company who will print the invitations for you.
For example, Papier offer a selection of beautiful wedding invitations which you can personalise, edit and then order to your door. Some even allow you to add a photograph of you and your partner to personalise it even further.
The beauty of these DIY invitations is that you get to personalise the design yourself, but don't then have to worry about printing them at home or paying someone else to do so.
Papier even have an option to upload your own design to a blank wedding invitation template. Here, you can add your own text, image and even a personalised QR code.
2. Printable Wedding Templates

Many couples wonder how to print DIY wedding invitations. If that's you, then you'll be pleased to know it's remarkably easy!
If you like the idea of printing your wedding invitations yourself (either at home or with a printing shop), online marketplaces like Etsy have hundreds of wedding stationery suppliers who can help you with this.
Lots of nearlyweds wonder: are there cost-effective ways to print DIY wedding invitations? And the answer is, yes.
There, you will find wedding invitation templates which you can personalise with your name and other details. The seller will then send you your own version to print at home. The cost of this is often much less, as you are mainly paying for the copyright of the design, but you will then have to pay for printing.
You may be wondering, why print it yourself when you could pay a business to do it for you? But for DIY-ers, the ability to print your own personalised wedding invitations means you can choose your own paper, perhaps one with a luxurious texture, and you can also add finishing DIY touches like a wedding stamp, additional stationery or yours and your partner's hand-written signature.
For those who want to deliver handwritten invitations, you might be asking - can you personalise DIY wedding invitations with calligraphy? Of course you can! Simply order the invites and write whatever you like on them. From calligraphy and drawings to even a crossword - the choice is yours.
3. From Scratch Wedding Invites

For those wondering: can you design wedding invitations for free online - you're in luck!
If the idea of creating your own digital wedding invitation (to print, or not to print!) sounds much more appealing, platforms like Canva are the way forward. They have options to buy certain templates and designs, but there are hundreds, maybe even thousands of free templates and design tools for you to use.
The platform is really easy to use and even if you're not planning to use templates, it has thousands to look to for inspiration and wedding invite ideas. When people ask us "what software is best for creating wedding invitations?" - we have to recommend Canva.
Once you've completed designing your own wedding invites, you can then print them at home or in a printers, or even keep them as digital wedding invitations and send them via email or WhatsApp.
Not a computer whizz or just much prefer to craft things by hand? If so, choosing to make your wedding invitations completely from scratch is the best option for you.
For crafting, Etsy, Hobbycraft, The Works, The Range and Baker Ross are all great places to source materials.
But where do you start? Well, below, we have some amazing inspiration ideas and guides on DIY wedding card invitations that are bound to spark some creativity, as well as tips underneath that include everything you should consider before, and throughout the process.
Ideas for DIY Wedding Invites
Now you understand the types, here are some DIY wedding invitation ideas you can steal. Whether you're adding a few DIY details yourself, or crafting the entire thing from scratch, these wedding invite ideas are sure to catch your eye.
4. Gold Foil Details

Gold foil is really cheap to buy and adds such an elegant and luxurious feel to any wedding invitation. This stationer has added foiling to the border of their insert card which looks amazing, but you could add gold foil anywhere to an invitation and it'd look brilliant.
If you're wondering how can you make DIY wedding invitations look professional, then elegant touches like this really make a difference.
The beauty about using gold foil on DIY wedding invitations is that they don't have to match! Gold foil looks its best when it's sparse and scattered everywhere, so there's no pressure to get everyone looking the same.
5. Watercolour Backgrounds

If you're a dab-hand with a paint brush, why not paint the background of your DIY wedding invitations with watercolours? Much like the gold foil idea, the beauty of watercolour paintings is how different and unique each one looks. As long as you use a similar placement and the same colours on each, they will look amazing as a set whether they look identical or not.
6. Personalised Stamps

Nearlyweds who have an eye for pretty details should consider decorating their DIY bridal invitations with personalised stamps.
Choose an ink colour that matches your wedding aesthetic and finish every invitation with a mark from your personalised stamp. It could read the names of the nearlyweds, the wedding date, or even a picture that reflects you as a couple. The choice is yours!
For couples wondering how can you add embellishments to DIY wedding invitations without overspending, this is a great cost-savvy option.
7. Pinned Wedding Invitations

If your wedding invitations, DIY or otherwise, consist of several sheets of paper, why not pin them together in the corner with a gold, silver or rose gold fasten? This way, the information is less likely to get lost, and guests can fan them out to see all of the pages.
Not only is this practical, but it's easy to do at home and adds a professional finish to handmade wedding invitations.
8. Hand-Tied Wedding Invitations

Adding something as simple as a hand-tied piece of string or ribbon to your DIY wedding invitations can give it the handmade finishing it needs. This particular invitation has been tied with hessian string to match the rustic design, and the paper is actually seeded paper which guests can plant in their garden afterwards!
9. Using Real Flowers

Another idea for plantable wedding invitations is to include an actual dried flower (or one that isn't dried!) - this could be a lovely way to tease your colour scheme or include actual flowers you're planning to use on the wedding day.
10. Floral Wax Seals

DIY wedding invitation ideas go far beyond the invite itself - what about the sealing of the envelope?
We love the idea of using dried blooms or botanical leaves to adorn the wax seals. These seals have a sticker which you peel off the back of the wax, making them super easy to use and stick onto your envelopes.
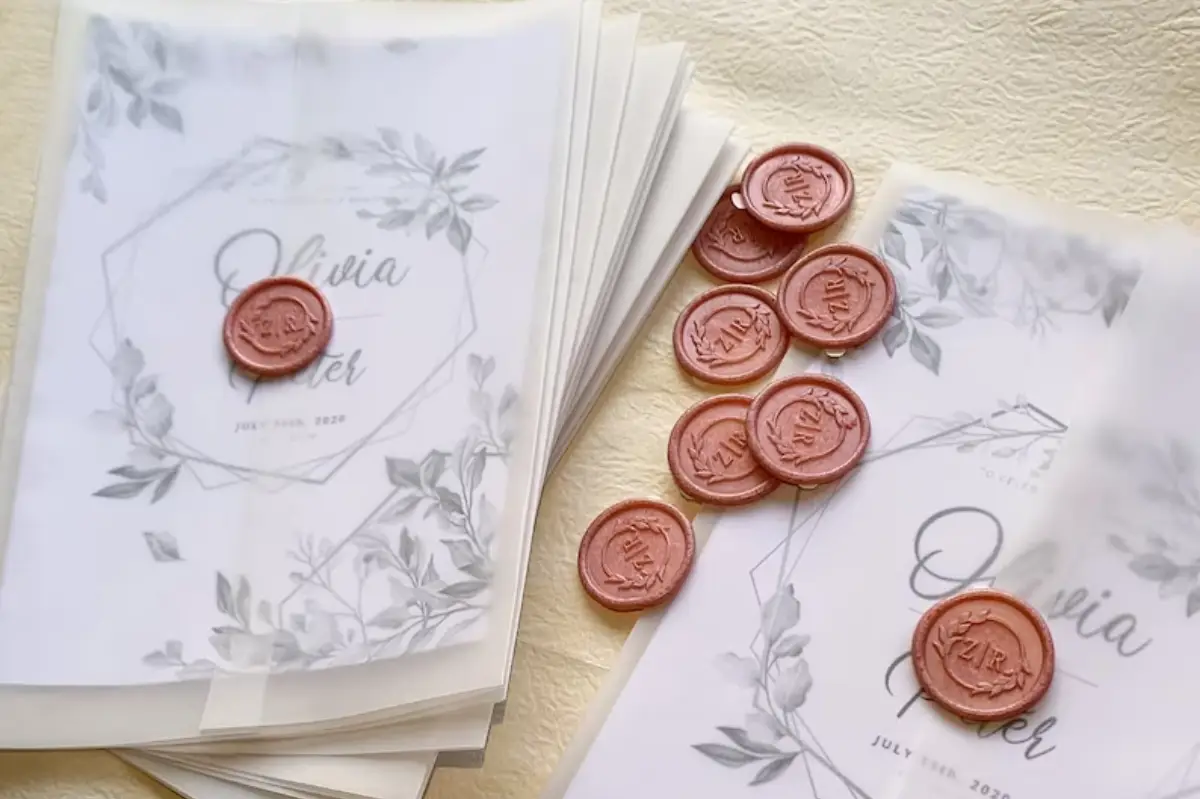
11. Personalised Wax Seals

Another idea for DIY wax seals is to personalise them with your initials. This can be done with real wax and a rubber stamp, or you can order ones to stick on yourself. They look so luxurious and will add such finesse to your designs.
12. Vellum Invitation Jackets

Another way to really elevate DIY wedding invitations is to have them wrapped in vellum cases. These translucent jackets are a great way to make homemade wedding invitations look professional and expensive, and these ones come pre-folded, saving you the job of doing it yourself.
13. DIY Envelope Inserts

One of our favourite DIY wedding invitation ideas is to personalise your envelope inserts. You can download generic templates with the shape of an envelope insert already drawn out - then all you have to do is print and cut them out, before sliding them in and enjoying the finished product.
14. Personalised Fabric Envelopes

Whilst these envelopes have been designed for students to give to teachers, we think they make really adorable wedding invitation envelopes too. Either order these exact ones from the designer, or get crafty and stitch your own at home!
You could order a printed fabric that matches your wedding colour palette, like white lace or floral patterns, and stitch the surname of each recipient into the wedding envelope. It may sound like a time-consuming task, but your guests can keep their personalised invites as a keep-sake from your special day.
15. Spray Invitations with Scent

For a really classy touch, why not spray each wedding invitation with a wedding scent of your choice? Some couples have a unique wedding scent designed for their big day, whilst others pick their favourite smell from brands like Jo Malone.
We also have plenty of tips and tricks on how to choose your wedding scent!
To give your guests a first impression of what to expect on your wedding day, spray each invitation with the scent that you plan to wear throughout the celebration.
Tips on How to DIY Wedding Invitations
Now you have some ideas to play around with, here are our top tips on how to perfect your DIY wedding invitations.
Know Your Vision
The first step to successfully creating DIY wedding invitations is to know what your vision is. Ask yourself: what materials do you need for DIY wedding invitations? What kind of theme are you going for? Consider what colours and tools will you need and what do you want the finished product to look like.
Take inspiration from professional wedding stationery designs, and think about what's possible with the time and skill you have.
Be Realistic About Your Skill Set
Whilst taking inspiration from professional wedding invitations is good for getting lots of ideas, it's really important to remember that this is not your profession and that being realistic about what you can do yourself will really benefit you in the long run.
If you are really quite skilled when it comes to DIY and crafting, you can set your sights higher in terms of design and intricacy, but if you're not, consider some of the alternative options, where you can half-DIY the invitations, instead of doing everything completely from scratch.
Practise Makes Perfect
Before you set your sights on a final design, practise, practise and then practise again. It's vital that you are confident in your design before you commit to making 50 or 100 yourself.
As you practise, you may want to tweak parts of the design to make it easier so ensure you leave yourself time to have a go.
Don't Assume It's Cheaper
Many people who wonder "how much do DIY wedding invitations cost?" opt to DIY parts of their wedding because they assume it'll be cheaper than paying a wedding supplier to do it.
Sometimes, it can work out cheaper to do something yourself, but that's not always the case. By the time you have bought all of the materials, tools and supplies you need, and take into consideration the time it'll take to create them all, it may work out the same, if not more expensive than paying for them.
That's not to say don't do it - there are more reasons to DIY things other than money, but don't assume it's a cheaper option as this isn't always true.
Set Aside Enough Time
Speaking of time, ensure you give yourself enough time to make all of the invitations. Making one may seem quick, but making DIY wedding invitations in bulk is a different story. Give yourself a deadline for when you want them sent out and then work backwards from there.
It's also worth giving yourself a buffer of time in case anything goes wrong or you run out of materials and have to source more. It's better to have them ready earlier than later.
Take Time to Proofread
When you hire a professional wedding stationery supplier, although you will always have final say over the wording, you have a second pair of eyes to help proofread for any mistakes. As you won't have this with DIY wedding invitations, enlist a second, third and maybe even fourth pair of eyes who can skim over the wording you choose.
Think About How They Will Travel
You can have all the best ideas in the world, but if you are planning to post your wedding invitations out, consider how they will travel. Don't choose any crafts that could easily be squashed or broken in the post and you will be absolutely fine!
On that note, as you create your DIY wedding invitations, take a look at our guide on what to include in your wedding invitation wording to ensure nothing gets forgotten.


